Helix Native User Preset
The Helix Native User Preset is not well documented in the Helix Native Pilot Guide. This post describes what I have discovered by watching YouTube videos and my experience with within Helix Native.
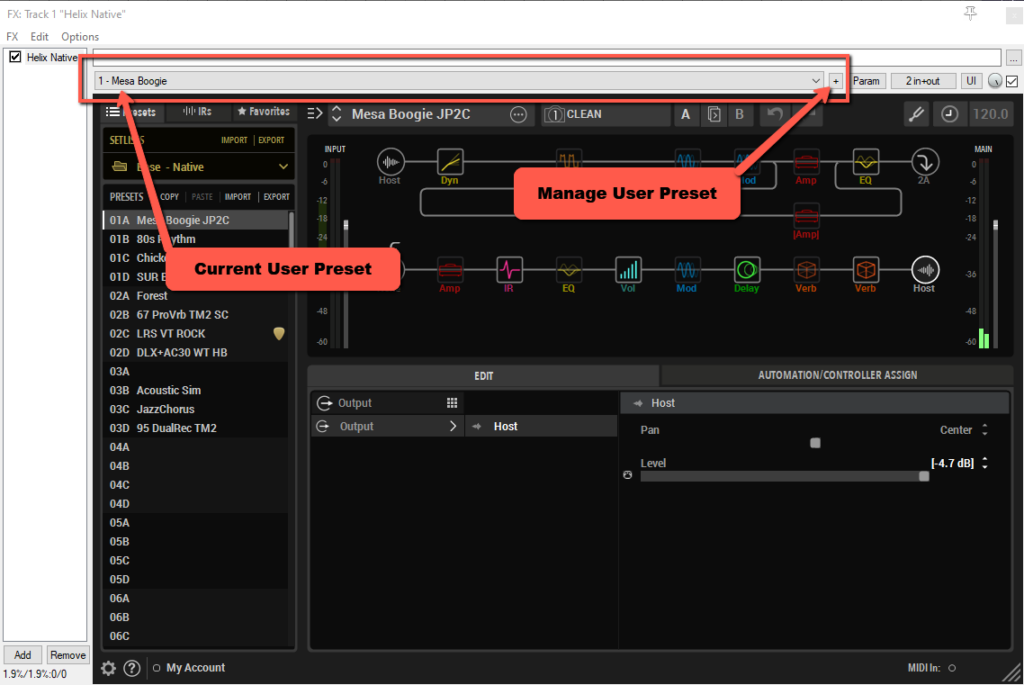
The image below shows the User Preset area in Helix Native. The plus sign (+) on the right of the user preset area is used to Save, Rename or Delete a user preset.

User Preset are defined by selecting an existing PRESET from the active SETLIST. Next, click the plus sign on the right side of the User Preset area to “save” the User Preset and give it a name when prompted.
The difference between a “User Preset” and an existing “PRESET” is that a sequential number is assigned to the User Preset. That sequential number can be used with a midi PC code to activate the associated User Preset. The first User Preset that is saved has the number “1” assigned. The second User Preset that is saved has the number “2” assigned and so on . . .
You can activate a User Preset by selecting it from the drop down list or by sending a midi PC code that is associated with the User Preset.
When a User Preset is active, you can make changes to any of the parameters for a selected component within the User Preset. For instance, you can change any parameter for a component within the current User Preset and Snapshot and then click the “+” to save it.
When you save changes to a “User Preset” it does not effect the original PRESET from which the User Preset was defined. Conversely, changes which are made to the original PRESET and saved to the preset library do not effect the associated User Preset. Be careful not to confuse the original PRESET and a User Preset which is defined from the original PRESET.